In this sixth part of the series we will configure the Citrix XenServer HA, create networks for the DMZ/WEB, APP/DB and client network zones. We will then upload the Windows Server 2022 installation media to the shared NFS ISO Library storage repository which we can use tocreate a New Windows Server 2022 virtual machine in the future blog post.
Open XenCenter and connect to the XenServer pool. Select HA tab and then click on Configure HA.

On the pre-requisite page you will be presented with the couple of pre-requisites for configuring HA.
First we must have at lease one shared storage repository of type iSCSI, NFS or Fibre Channel. We have configured two NFS storage repositories in the previous article https://virtshinobi.blog/part-5-configuring-shared-storage-nfs-storage-repositories/
Second the virtual machines that need to be protected must be agile, meaning they should be on the shared storage. We do not have any VMs created yet.
Click Next to continue.

On the Heartbeat SR page, the NFS shared repository NFS_SR01 is selected as the heartbeat SR.

On the HA Plan page change the Server failure limit to 1 from 2. Since we have only two servers in the pool, we will configure it to 1. Click Next.

Review the configuration summary and click Finish to exit the wizard.

You can monitor the status of the task at the bottom. Once HA is configured you can see the status of the same under HA tab.

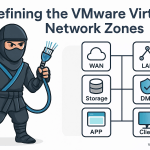
In the previous articles of the series we have configured network bonds for Management and storage networks. Next we will configure the network bonds for remaining DMZ/WEB, APP/DB Server and Client networks.
In XenCenter, select the Networking tab and select Add Network.

Select Bonded Network and click Next.

Select the NICs 4 and 5 assigned to the VMware workstation network DMZ/WEB Zone, for Bond Mode select Active-passive and click on Finish.

Follow above steps to create the bonds for the APP/DB and Client network zones as shown below.

Next we will copy Windows server 2022 iso file to the NFS repository using WinSCP. Open WinSCP. On the new login window, select SCP for File protocols, enter XENHOST01 for hostname and enter root username and password and click Login.

Click Accept, for the host key warning.

On the left side, browse to the ISO file to be copied to the XenServer and select it. On the right hand side (i.e. XenServer host), browse to the directory /var/run/sr-mount/2257a89c-054d-6eef-32ed-4173dd7f8302 where 2257a89c-054d-6eef-32ed-4173dd7f8302 represents the UUID of the NFS ISO Libary which one can find from the General tab for the storage repository in XenCenter.

Select the ISO file on the left hand side and drag it to the right side. Monitor the copy progress.

Once the copy is complete you can see the ISO file on the right hand side.
Go back to XenCenter, Click NFS ISO Library, click on Storage tab. You will be able to see the ISO file there. Now we can use this ISO file to create virtual machines.

Discover more from VirtShinobi.blog
Subscribe to get the latest posts sent to your email.