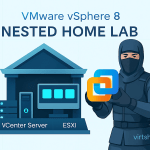
Deploying VMware vCenter Server 8 inside VMware Workstation is a great way to build a home lab or test environment. Here’s a streamlined guide to get you rolling:
Prerequisites
- VMware Workstation installed
- vCenter Server 8 ISO (download from VMware portal or VMUG Advantage)
- Enough system resources (RAM, CPU, disk space)
- OVF Tool (included in the ISO)
Download and extract the VMware vCenter 8 appliance ISO.

You should find the VMware vCenter appliance ova file and the ovftool folder inside the vcsa directory as shown below. We will use the ovftool utility to convert the .ova file to the .ovf format in order to deploy it in VMware Workstation.

Open the command prompt and navigate to the path where you have extracted the vCenter appliance iso\vcsa\ovftool\win32.
for example: E:\ISO\VMware-VCSA-all-8.0.3-24022515\vcsa\ovftool in our case.
Run the below command to convert the .ova file into .ovf format.
ovftool.exe E:\ISO\VMware-VCSA-all-8.0.3-24022515\vcsa\VMware-vCenter-Server-Appliance-8.0.3.00000-24022515_OVF10.ova E:\ISO\VMware-VCSA-all-8.0.3-24022515\vcsa\VMware-vCenter-Server-Appliance-8.0.3.00000-24022515_OVF10.ovf

In Windows Explorer, navigate to the E:\ISO\VMware-VCSA-all-8.0.3-24022515\vcsa directory and you should see the .ovf file created with bunch of other files needed to deploy the vCenter Appliance including corresponding .vmdk and json files.
Note: Make sure to delete the manifest file ending with the .mf extension in order to avoid any errors that we may see later.

Right click the .ovf file and open it with notepad. Hit CTRL+F on your keyboard and enter guestinfo.cis.upgrade.import.directory in the search bar.

Change the value for ovf:userConfigurable=”false” to “true” as shown the screenshot below. Save the file once done.

To start the vCenter Appliance 8 deployment process, open VMware workstation, click the File menu and click Open.

Navigate to the directory of the vCenter appliance .ovf file, select it and click Open.

In the Import Virtual Machine wizard accept the license agreement and click Next.

Enter the name for the virtual machine for example VCENTER01 and click Next.

For Deployment Option select Tiny vCenter Server with Embedded PSC and click Next.

For Network Configuration, enter the information as shown below.
- IP Address = 10.100.1.25
- Gateway = 10.100.1.11
- DNS Server = 10.100.1.21 (Master Domain Controller)
- Host Network Identity = vcenter01.virtshinobi.local (Hostname for the vCenter appliance)

Click SSO configuration and enter the password for the [email protected] superuser account.

Click System configuration and enter the password for the vCenter appliance root account.

For Upgrade Configuration and Miscellaneous tabs leave the default options as it is. Click Networking Properties tab and enter the domain name virtshinobi.local for both Domain Name and Domain Search Options fields and click Import.

Monitor the Import progress.

Unlike when deploying the VMware vCenter Appliance to an ESXi host when deploying it on the VMware workstation we don’t get a chance to select the network for the virtual machine NIC. In our case we will change the it to custom network VMNet1 from the Management Zone and having the 10.100.1.0 IP range.
In VMware Workstation, right click the virtual machine VCENTER01 and click Settings. Select the Network Adapter and change it to Custom:VMNet1 and click OK.

Next we need to configure the vCenter appliance using the vCenter Server Appliance Management Interface (VAMI).
Open the web browser of your choice and navigate to https://10.100.1.25:5480. Accept the self sign certificate warning and continue.
Enter the root password set during the deployment process and click LOGIN.

The phase 1 of the deployment is complete. To begin with phase 2 of the deployment process and configure the VMware vCenter appliance, click Setup.

On the Introduction page click Next to continue.

Most of the information will be auto populated from the deployment phase 1. For Time synchronization mode select Synchronise time with NTP servers and enter the IP address of the NTP servers. I have entered the IP address of the master domain controller (10.100.1.21) which I am using as a time source / NTP server in this home lab environment.
If you want to enable SSH access to the appliance, select Enabled from the drop down menu. I am leaving it disabled. It can be enabled from the web console of the vCenter appliance later. If you want to configure vCenter High Availability (HA for vCenter Server), you will need to enable SSH.
Click Next to continue.

Under SSO configuration, enter the SSO domain name and SSO Admin user credentials. For simplicity sake I have kept default values for the SSO domain name. You can change it to your liking. Click Next to proceed to the next step.

Uncheck the box to opt out of the VMware’s Customer Experience Improvement Program and click Next.

On the Ready to complete page, review the settings and click on Finish.

You will see a warning that you will not be able to pause or stop the install from this point onward. Click on OK to accept the warning and continue.

The appliance setup will begin. Monitor the progress on this window, as the services are configured and started. Again the process may take some time to complete, so make sure you grab another cup of coffee.

Once the vCenter Server Appliance setup is complete you will see the below screen. Make a note of the URL for the Appliance Getting Started Page. You can click on the link to access it right away or click on Close to exit the installer.

Enter the URL for the vCenter Server in web browser (https://vcenter01.virtshinobi.local/ui) and enter the Single Sign On Administrator account credentials to login to the vCenter Server.

The vCenter Server appliance setup is complete now.

Discover more from VirtShinobi.blog
Subscribe to get the latest posts sent to your email.