In part 5 of the series we will create a virtual machine for the Master Domain controller and DNS server and install the required roles.
Open VMware Workstation. Go to File menu and select New Virtual Machine.

Select Typical and click Next.

Select I will install the operating system later and click Next to continue.

Select Microsoft Windows as the guest Operating System and Windows Server 2022 as the version. Click Next.

Enter the desired virtual machine name, for example MASTERDC. Click Next.

Enter the disk size as 60GB, Select Store virtual disk as a single file. Click Next.

Click on Customize Hardware.

Click New CD/DVD (SATA). Select Use ISO image and browse and select the Windows Server 2022 ISO file.

Click on Network Adapter, Click on Custom and select /dev/vmnet1 virtual network from the drop down menu. Click Close.
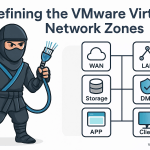
Remember we have associated the pfSense firewall LAN interface / Management (MGMT) zone with this network. The domain controller will reside in the Management Zone / the LAN network.

Click Finish.

Click Power on the virtual machine.

The virtual machine will boot. Click inside the VM console and click any key on the keyboard to start the Windows installer.

On the Windows setup page click Next to continue.

Click on Install Now.

Select the version (with GUI) of the Windows Server to install and click on Next to continue.

Accept the license terms and click Next.

Click on Custom: Install Microsoft Server Operating System only (Advanced).

Select the drive to install Windows to and click Next.

The Windows Installer will start copying files and continue with the setup.

Once the installation is done the virtual machine will reboot.

Enter the password and click Finish to continue.

Type the keys Ctrl+Alt+Insert or from the VM menu select send Ctrl+Alt+Del.

Enter the password and Enter key to login.

On the server manager, click on Local Server and then click on the Computer Name.

Click Change.

Enter the new Computer name, for example MASTERDC and click OK.

Click OK.

Click Close.

Click on Restart Now, to reboot the server.

Once the server reboots, again go to Local Server in Server Manager and click on Ethernet0.

Right click the network adapter Ethernet0 and select Properties.

Select Internet Protocol Version 4, and click on Properties.

Configure the network settings as shown in the screenshot below and click OK once done. Since we will be configuring this virtual machine as the Domain Controller and the DNS server as well, in the DNS server settings enter 127.0.0.1 (localhost) for the preferred DNS Server and the google DNS server IP 8.8.8.8 as the Alternate DNS server.

Click on Close.

You can see the IP address configured in the Server Manager.

Next we will add the Active Directory Domain Services and DNS server roles. To configure them select Dashboard on the server manager and click on Add roles and features link.

On Add Roles and Features Wizard, click Next to continue.

Leave the default option selected and click Next.

Select the server hostname and click Next.

Select Active Directory Domain Services and click Next.

Click Add Features.

Click Next.

Click Next.

Click Next to continue.

Click Install to begin the installation of roles and features selected.

Once the Roles and Features installation is complete, click on the link Promote the server to a domain controller.

Select Add a new forest, type in the root domain name virtshinobi.local (yours may vary) and click Next.

Type in the password for the Directory Services Restore Mode. Click Next.

Click Next.

The NetBIOS domain name will be auto populated. Click Next to continue.

Click Next.

Review the options and click Next.

The configuration wizard with review the pre-requisites and confirm once the checks are passed successfully. Click Install to proceed.

The installation will continue and the server will be rebooted automatically.

Once rebooted, login into the virtual machine. Click on start and Administrative tools and Open DNS manager.
We will be creating the forward and reverse lookup zones and creating the DNS entries for the different virtual machines we have built so far.
Expand MASTERDC, right click Reverse Lookup Zone and click New Zone…

In the New Zone Wizard click Next to continue.

On the next page, leave the default options selected and click Next.

Again leave the default options selected and click Next.

Click Next to continue.

In the Network ID field enter 10.100.1 and click Next.

Leave the default option selected and click Next.

Click Finish to close the wizard.

Go back to DNS Manager, expand Forward Lookup Zone and click on the domain name virtshinobi.local.

We will create A record entries for the virtual machines we will be creating in future articles of this home lab series. For example the pfsense firewall (pfsfw01), OpenFiler storage appliance (filer01), vCenter Server (vcenter01) and couple of ESXi hosts (esxi01 & esxi02).
Right click the zone virtshinobi.local and select New Host (A or AAAA) from the menu.

In the New Host wizard, enter the DNS name to be created, for example pfsfw01 for the pfSense firewall appliance. Enter IP address 10.100.1.11 and select the checkbox Create associated pointer (PTR) record. Click on Add Host to add the A record.

Similarly create DNS A records for other virtual machines as shown below.

Also create host file entries on your base Windows / Linux system where VMware Workstation is installed. Below is the snippet from the local hosts file from my base Windows machine.

Discover more from VirtShinobi.blog
Subscribe to get the latest posts sent to your email.