In the fourth part of this series we will continue configuring the pfSense virtual firewall. We will define and configure the settings for the different network zones.
Open web browser such as Chrome or Firefox and enter https://192.168.1.12 or the IP address you configured for the LAN interface. You will be granted with the warning. The warning is because the appliance is using a self-signed certificate. Nothing to worry. Click on Advanced to continue.
Click on Proceed to 192.168.0.112 (unsafe) and you will be greeted with the below login screen.
Enter the below default credentials to login.
Username: admin
Password: pfsense

The initial setup wizard will start. Click Next to continue.

Click Next to continue.

Enter hostname (pfsfw01), domain and DNS server settings and click Next to continue.

Leave the default setting for time server. Change the time zone as per your region and click Next.

We have already configured the WAN interface settings. Scroll down to the bottom of the page and Click Next.

Similarly the LAN Interface settings are also configured initially. Click Next.

Set the admin account password. Click Next.

Click Reload to save the settings.

Once the configuration is reloaded, you will be prompted with below screen. Click Finish to close the configuration wizard.

Click Accept on the copyright and trademark notice.

Click Close.

You will be greeted with the below dashboard.

Next we will proceed with enabling and configuring the different network zone interfaces.
Click on the Interfaces menu and select Assignments.

Select the interface em2 and click on Add.

Perform similar steps to select interfaces em3 to em5 and click on Add. Click on Save to save the changes made.

Next we will configure the individual interfaces. Click on Interfaces menu and select the interface OPT1.

Select Enable Interface. In the General Configuration section, enter description as ISCSI Storage, select Static IPv4 from the drop down menu against IPv4 Configuration Type.

In the Static IPv4 Configuration section, enter 10.100.2.11 as the IPv4 Address and change the subnet mask again / from 32 to 24. Click on Save.

Click Apply Changes to save the configuration changes.

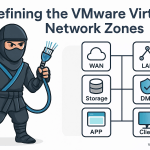
Configure the rest of the interfaces for different network zones following the above steps and as per the the IP Address Schema table shown below.

| Interface | IP Range | Netmask | Gateway | VMware VMNet |
| WAN | 192.168.1.11 | 255.255.255.0 | 192.168.1.1 | Bridged |
| LAN | 10.100.1.0 | 255.255.255.0 | 10.100.1.11 | VMNet1 |
| Management, vMotion, FT | 10.100.1.0 | 255.255.255.0 | 10.100.1.11 | VMNet1 |
| Storage iSCSI / NFS | 10.100.2.0 | 255.255.255.0 | 10.100.2.11 | VMNet2 |
| WEB / DMZ | 10.100.3.0 | 255.255.255.0 | 10.100.3.11 | VMNet3 |
| APP / DB Servers | 10.100.4.0 | 255.255.255.0 | 10.100.4.11 | VMNet4 |
| Clients | 10.100.5.0 | 255.255.255.0 | 10.100.5.11 | VMNet5 |
Discover more from VirtShinobi.blog
Subscribe to get the latest posts sent to your email.